Kissflow
Pre Built Low-Code Apps
Building apps using low-code functionalities is a cakewalk, requiring minimal training and coding knowledge. The solution follows a visual app-building approach that empowers anyone to build simple to complex apps without employing developers.
Install fully functional pre-built low-code apps to instantly automate and digitize your internal operations. Download apps to streamline your work without having to build from scratch.

Bug Tracking System
Improve software development with a tracking app for effective bug identification, prioritization, and resolution
Creator
Language
English
Category
Project Management
Bugs, defects, or faults in software cause it to produce an undesired or unforeseen output. These software bugs/defects may necessitate special attention from the development team. However, bug tracking can become tedious without an all-in-one app to monitor the bug status. That's where the bug tracking app comes in, assisting developers in logging new bugs, effectively prioritizing them, and closing them on time. The app includes a board with various stages and individual cards where you can set priorities, assign due dates, add assignees, find duplicate bugs, and do much more. With this app, you can set filters and see recent bugs to determine their significance. This Bug Tracking tool is indispensable for development teams to keep their agile software development journey on track.
Logging new bugs
Create new bugs, set due dates, and add assignees to them easily.
Set priorities such as critical, high, medium, and low.
Attach screenshots or files along with the bug details filled in the form.
Tag and collaborate with others in the comments once you submit a bug.
Finding duplicate bugs
Bug creators may find duplicate bugs based on the bug summary entered.
Add as a watcher to those existing bugs to track their status.
Multi-stage kanban board
Collaborate seamlessly between teams using the kanban board with multiple stages such as New, Dev in progress, Resolved, etc.
Mark tickets as closed, change assignees, modify due dates, and set different priorities directly from the board without having to traverse through the form.
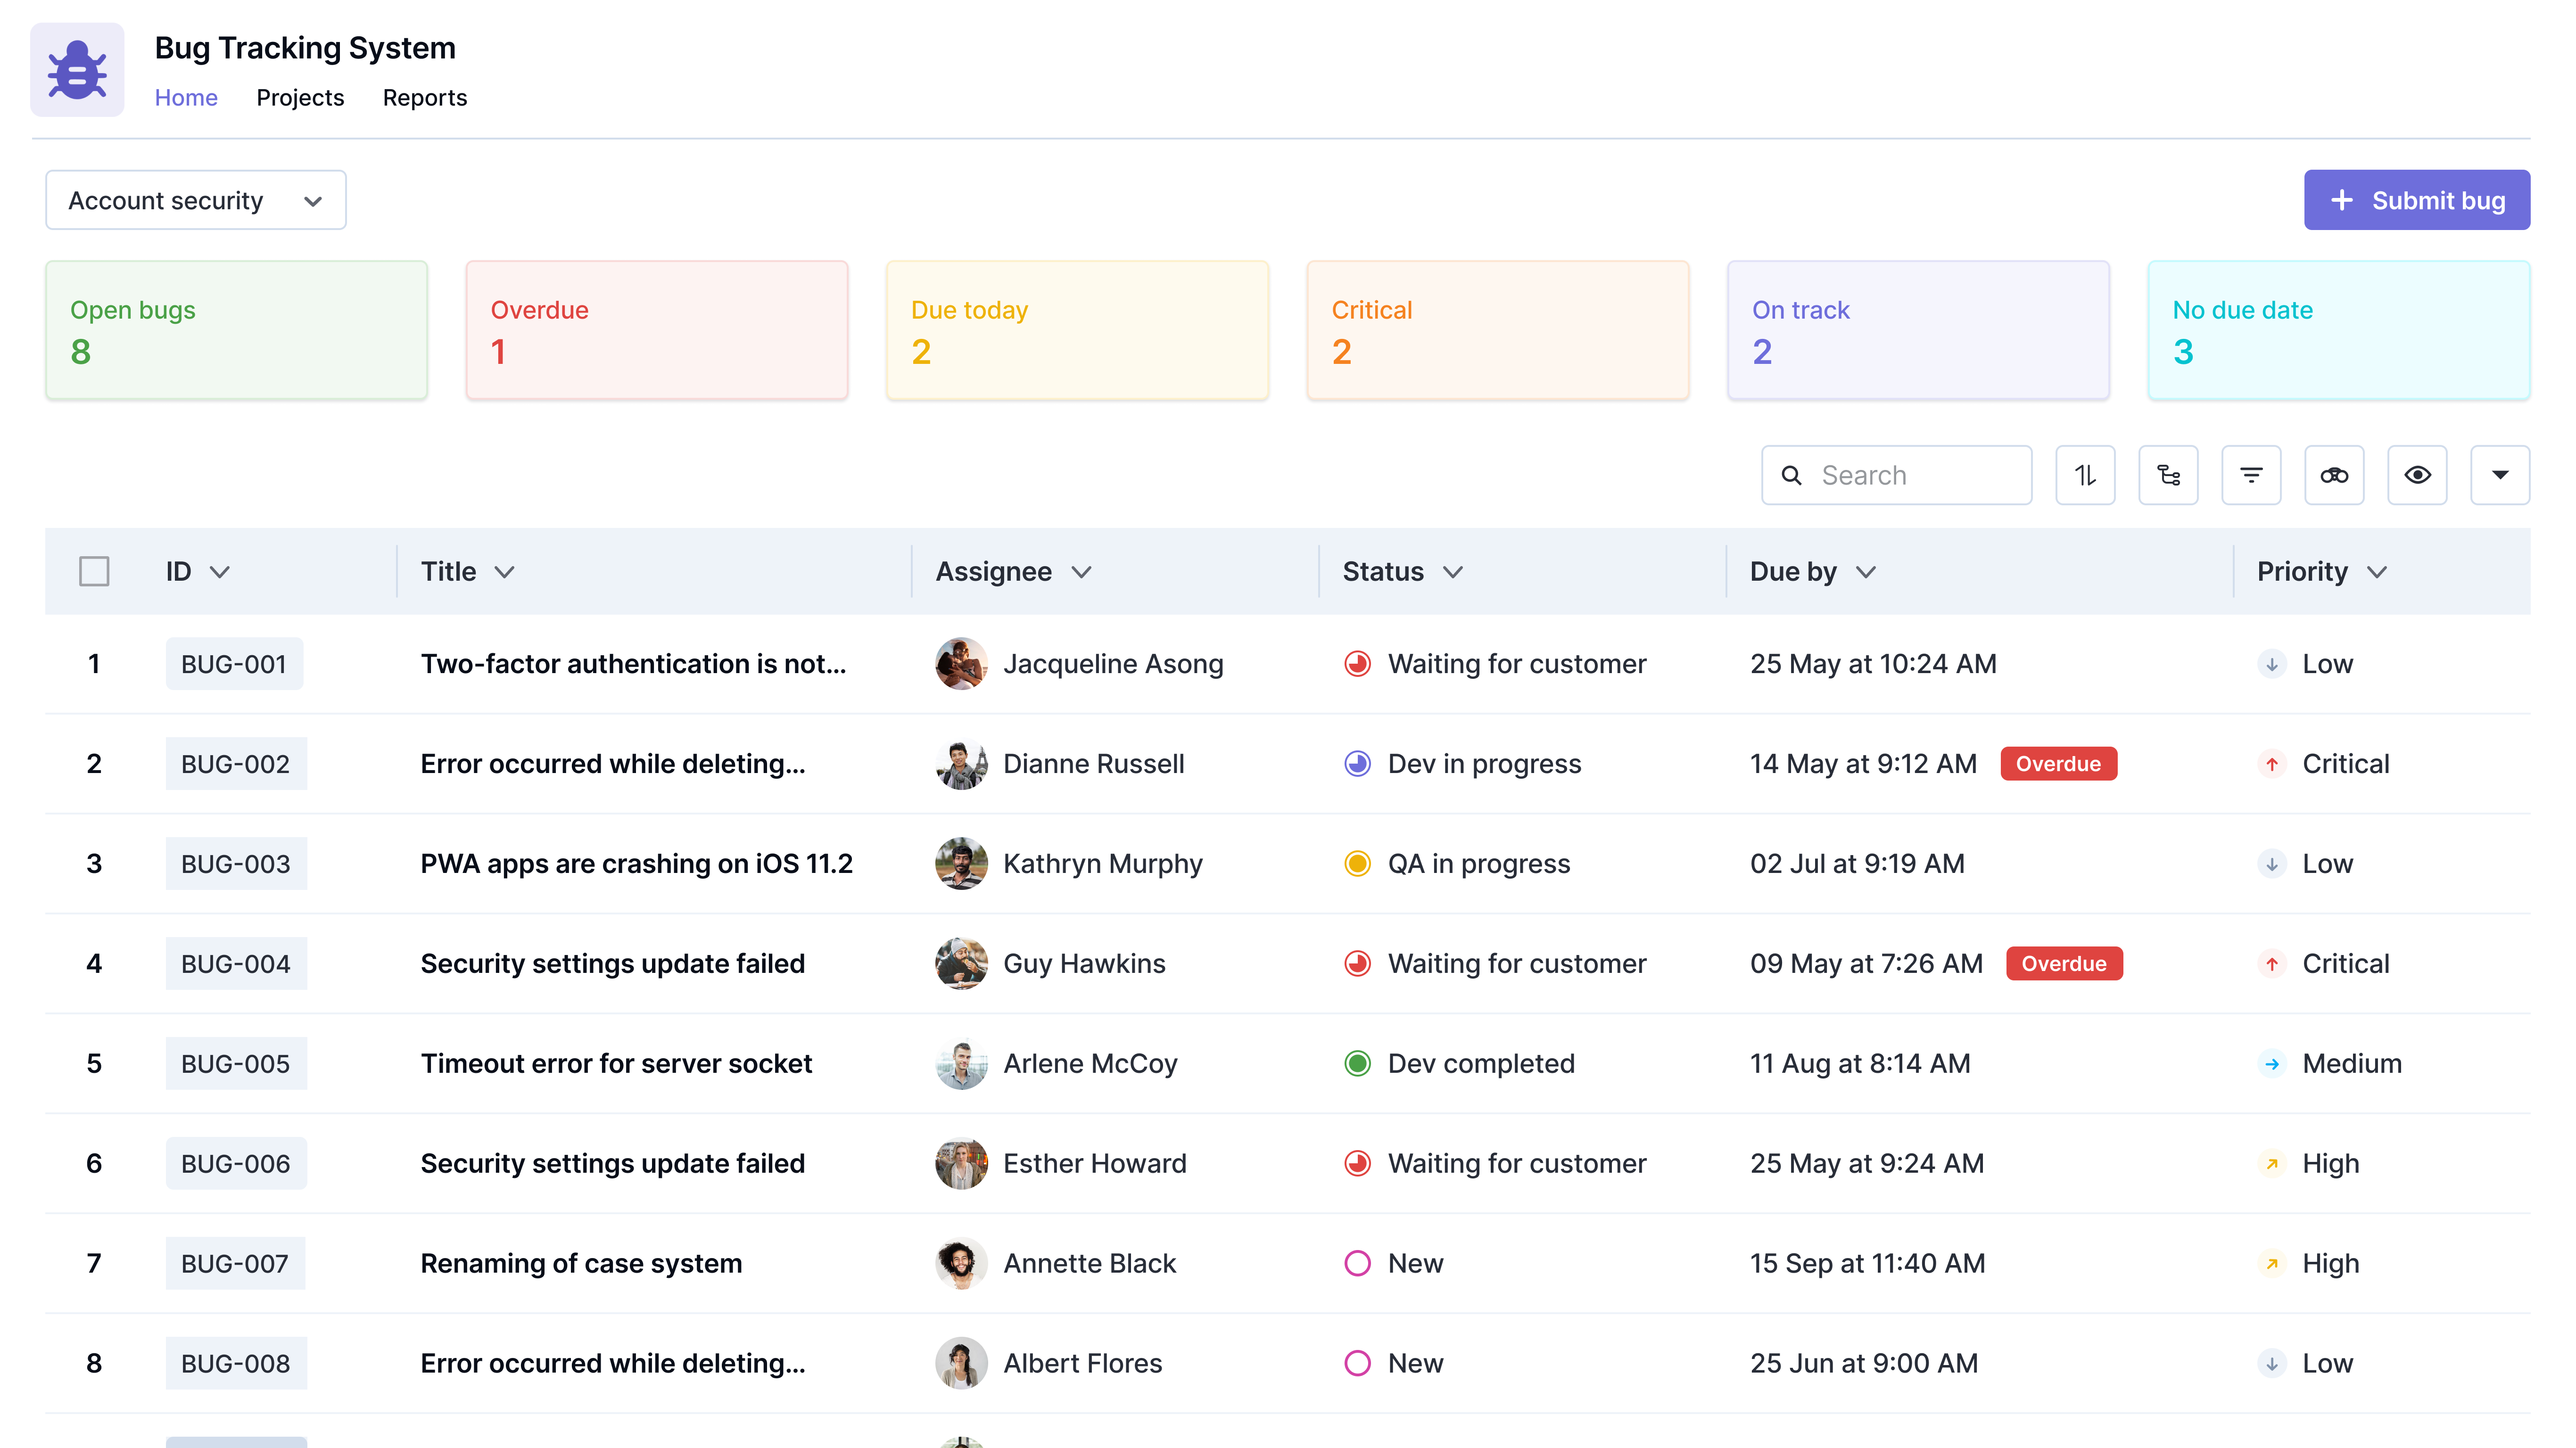
Get insights on the open bugs, bugs that are overdue, due today, etc, for the individual.
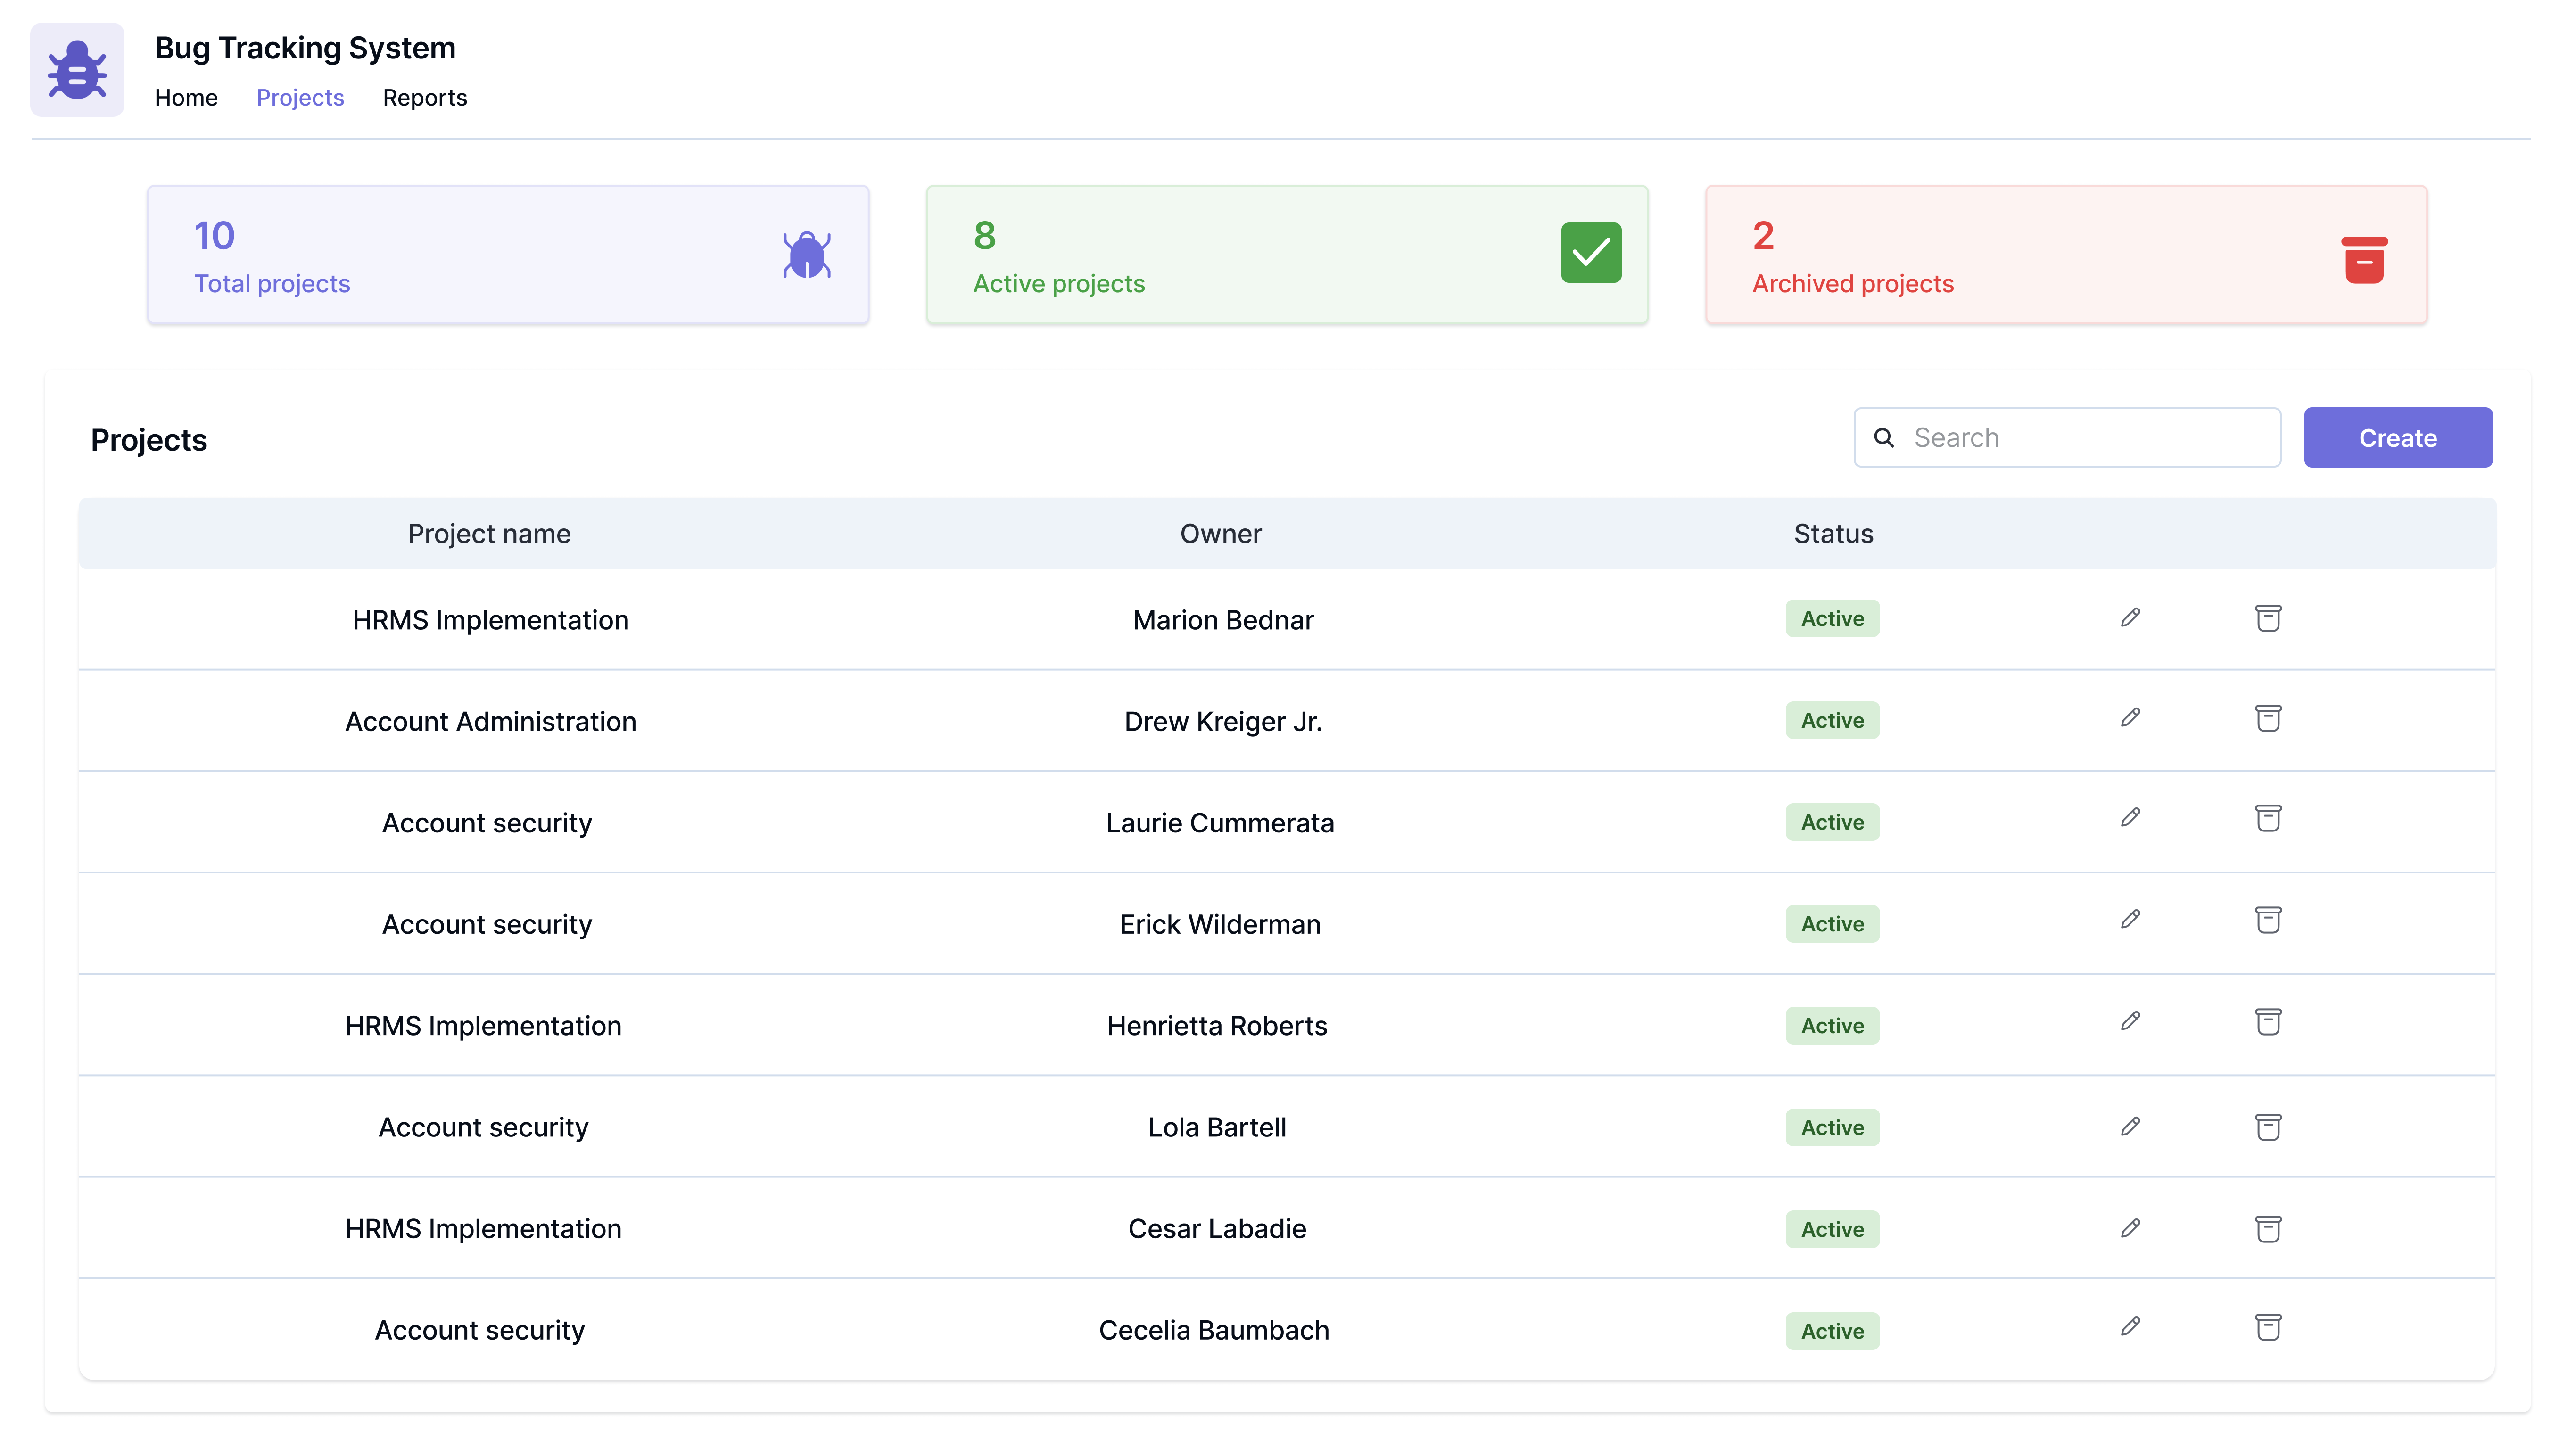
Projects
Leads and managers can create projects to track bugs.
Add members and sub-modules to the project.
Ability to edit projects as and when necessary.
Archive projects when they are no longer needed. You can activate them anytime.
List view for leads and managers
View the bugs associated with the project in a list view.
Filter bugs based on the assignee, due date, priority, projects, etc.
Get insights on the overall project’s open bugs, bugs that are overdue, due today, etc, on the home page.
Ability to sort bugs, show/hide fields, track child issues as sub-items, and view bugs in the watchlist.
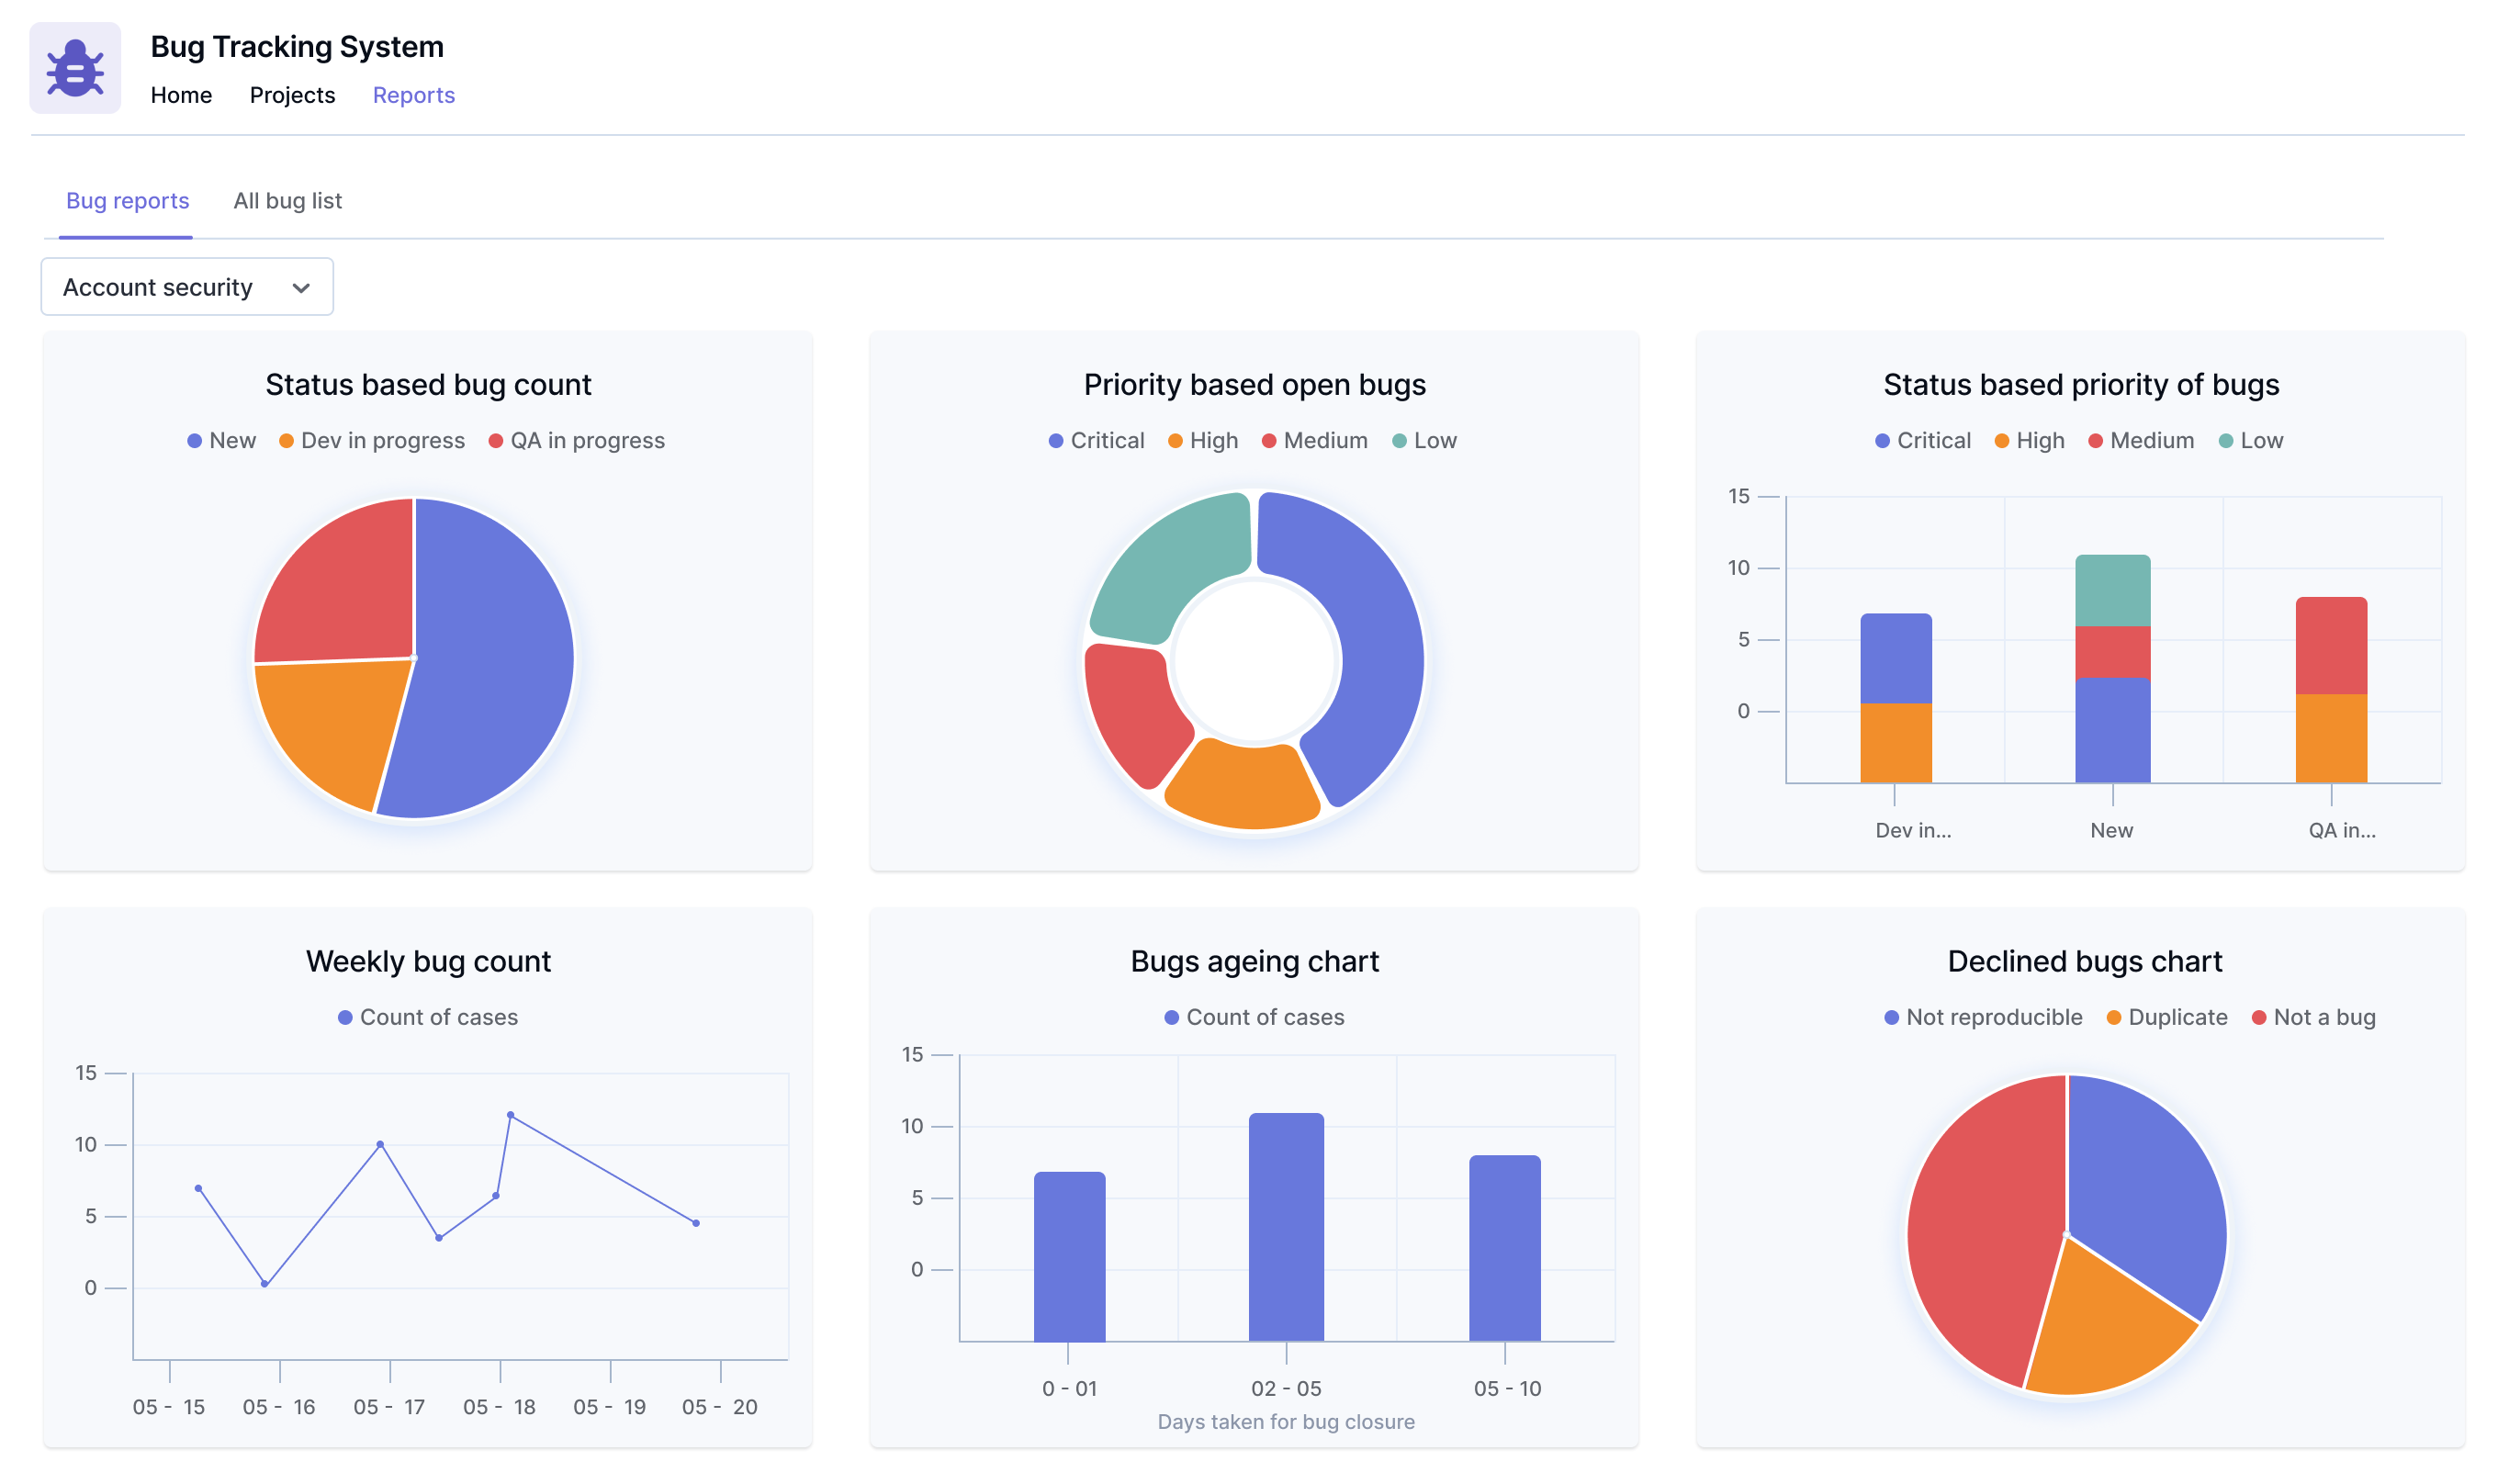
Reports and charts for effective tracking
Gain insights on the priority-wise distribution of bugs, status-based bug classification, duplicate bugs distribution, etc.
Track the weekly bug count and the aging of bugs using charts.
Installation
Sign in to Kissflow, go to the Kissflow App Store, locate the app, and install it.
After installation,
On the app, click the Open button.
You’ll be redirected to the application.
To add users to the account, click your profile picture on the top-right corner of the page > Account administration > User management. Then, click Add a user button and enter the first and last name, as well as your email address. Select the User type and click Add.
To access the app, you must first provide a role to yourself and the users.
Assigning roles
Users must be assigned to their respective roles as part of the app configuration, and it needs to be done on the Roles page. Each user must be assigned to only one role.
Alternatively, you can assign roles by following the below steps:
Click the More options button (...) located at the top-right corner of the app.
In the dropdown, click Share.
Under Roles, click Manager members to add a user to a specific role.
You can find the various app roles and its description below.
Roles and description
Project lead
Leads and managers of software/technical projects are added to this role.
Project leads can view all the bugs across projects, create new projects, add members to the projects, archive projects, and get reports on project bugs.
QA lead
Quality Assurance leads from the engineering team are added to this role.
QA leads can view all the bugs across projects, create new projects, add members to the projects, archive projects, and get reports on project bugs.
Customer support lead
Leads and managers of customer support are added to this role.
Customer support leads can view all the bugs across projects, create new projects, add members to the projects, archive projects, and get reports on project bugs.
Developer
Developers who are part of the engineering team are added to this role.
Developers will be able to work on the bugs assigned to them, create new bugs, and get user-specific data in reports.
Tester
Testers who are part of the engineering team are added to this role.
Testers will be able to work on the bugs assigned to them, create new bugs, and get user-specific data in reports.
Customer support agent
Members of customer support are added to this role.
Customer support agents will be able to create new bugs, work on the bugs assigned to them and get user-specific data in reports.
Initiator
Any other members of the project other than the specified roles are added as an initiator.
Initiators will be able to create new bugs, work on the bugs assigned to them and get user-specific data in reports.
Adding admins
The user who installs the app is the app's admin by default. Other users may be added as admins to the app by an admin.
To add an admin:
Click the More options button (...) located at the top-right corner of the app.
In the dropdown, click Share.
On the Share page, click the + Add developers button.
Add users or groups as developers and grant them Admin roles.
Click Add to submit.
Other required configurations
Setting up the integrations
Once the roles are assigned, the app admin must enable all preconfigured integrations.
How to turn on the integrations?
Click the More options button (...) located at the top-right corner of the app.
In the dropdown, click Manage integrations.
Go to Connections and click Connect for each integration to authenticate.
Navigate to All integrations and turn on all the integrations.
Didn’t find what you're looking for?
Let us know what we can build it for you


